Live Loops in Logic Pro
Posted by Esteban Miranda on
When it comes to Digital Audio Workstations, there are a number of different ways to make music.
Back when music was made in recording studios, and recorded onto physical tapes, there was only that one way of getting things down, but thanks to modern music technology there is a wide range of ways you can approach being a musician.
The main two are timeline based music making - which we are all familiar with as being the traditional view on DAWs like Logic, Cubase or Pro Tools - and loops based music making, which we know from Ableton Live, and to some extent FL Studio with its Channel Rack and patterns.
Users of Logic Pro were, for a long time, deprived of the second way of making musical ideas, which has been present in Ableton Live.
Ableton Live uses Session View, allowing you to create individual clips of audio or MIDI, and have them looping in various combinations to play around and experiment with structure and other ideas.
But thanks to a series of updates over the past few years, Logic now has Live Loops, an intuitive version of this same concept.
In this guide we will cover:
- An overview of Live Loops mode in Logic Pro
- How different ways of music making work
- Some fun ideas for working with Live Loops.
Let's dive right in!
Different Ways of Making Music
Most DAWs have the traditional tape recorder paradigm as a way of sorting projects; the music is displayed on a timeline in a linear fashion, which for a long time was the typical way digital software worked.
There were early versions to break out of this tradition, such as EMagic's Notator & Creator programs, with Ableton's Session View being the most commercially successful way of breaking the mold of this traditional linear way of creating and organizing music.
However, with Logic's 10.5 update we saw the introduction of Live Loops, an innovative way to create music in Logic using non-linear ways. Using Live Loops, you can arrange and play with musical ideas in real time in a grid of cells, each containing a musical phrase or loop.
On the opening screen of Logic you're prompted to choose whether you want to create a Live Loops project, and you can add all of the same kinds of regions to cells that you can add to tracks in the Tracks area – audio, MIDI, Step Sequencer Pattern and Drummer regions, and more.
You can even record audio or MIDI directly into a cell. Then, play back cells individually or as entire columns (called scenes), experimenting with different combinations until you've found just the right arrangement.
It's a fun and exciting feature, and if you aren't familiar with it from using Ableton's Session View, you'll find it very interesting and exciting.
I'm an Ableton user so I'm familiar with the non-linear concept of this type of music making, but I'm assuming you folks reading this are coming for some information! So we will cover how Live Loops works, and some tips for using it.
Live Loops
Does anyone else think the name Live Loops could be an ode to Ableton Live? Compelling, especially since it's basically doing the same feature as Session View in Ableton!
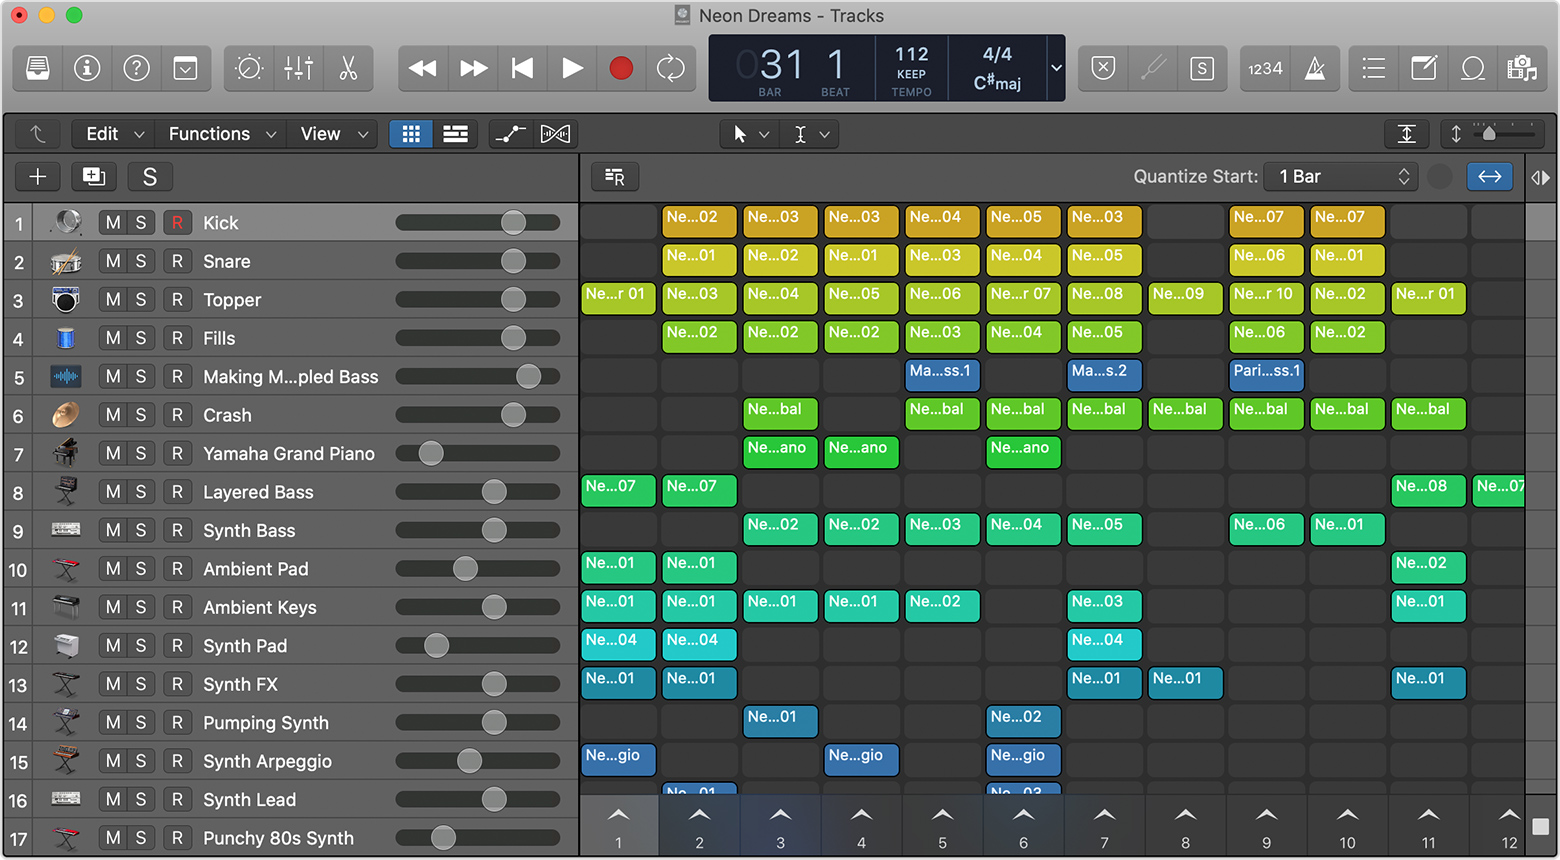
So, along the top of Logic's Transport Bar you'll find the button to toggle between the Live Loops setting and the Tracks View. You can see it below with the Live Loops button toggled.

When toggled, you'll see the Live Loops view, which is somewhat similar to the main view of Logic, but with some pretty key differences.
Looping Fun
One of the most important controls you need to be aware of is the Quantize Start Value, which defines where the cell starts and stops, and also makes sure all your recordings play back together in a logical, synchronised fashion. You can set it at 1 Bar to begin with, but you can adjust this and experiment once you're more comfortable with how things work.
Making music in a DAW is a process which undoubtedly works differently for different people, and the introduction of Live Loops to Logic Pro is a beautiful example of how you can add in new ways of working to facilitate musical ideas.
In prepping for this guide I did an extensive amount of jamming and playing around in Live Loops, and it's a super fun experience which even my kid got involved with! It's intuitive, fun and exciting, and it allows you to feel your music as you're making it.
This last point is super important, because so often making electronic music feels like a chore in a DAW; you add an element in, you hit play, hear if you like it, and repeat. With Live Loops, you're working in real time and things just flow more easily.
A break from Timeline based music
It's always great when a DAW (or any piece of software, really) introduces a novel way of working, which facilitates ideas in such an intuitive and beautiful way.
What really enhances the Live Loops experience is combining it with the use of Logic Remote (preferably on an iPad) and jamming, using the iPad as a controller.
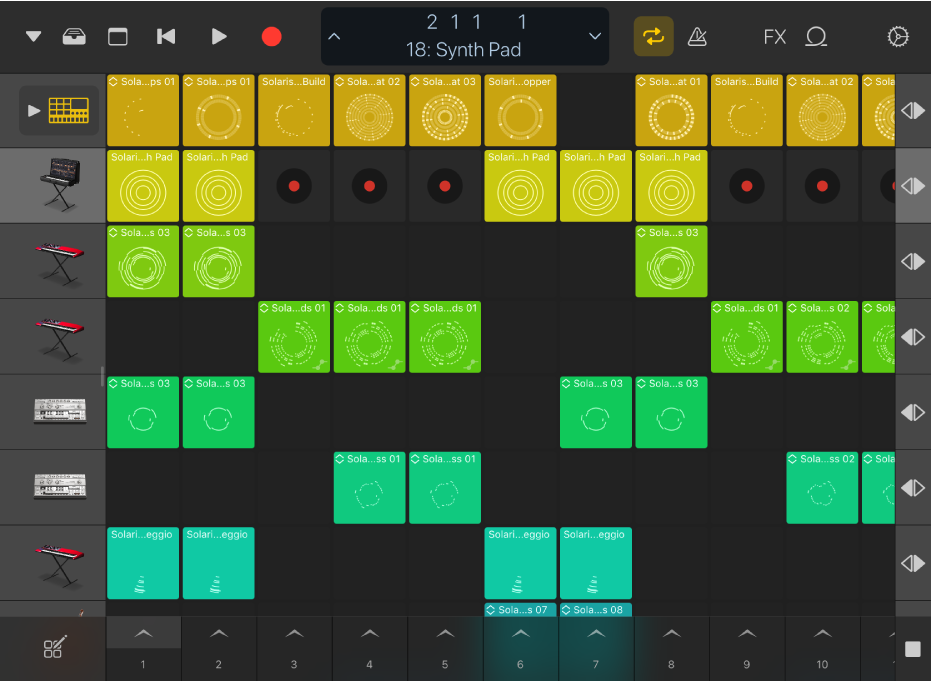
The beauty of using Logic Remote to trigger Live Loops is that you can do most of the functions you can do in Logic, using Logic Remote.
You can start and stop cells freely, queue cells for playback, edit cells and scenes, record to cells, use track controls, and Apple Loops and even record a Live Loops performance to the Tracks Areas.
This last point is the best of the bunch; being able to jam around in Live Loops, while recording your jam into the tracks area, means you can intuitively create music in a super fun and exciting way.
Live Loops - particularly when paired with Logic Remote on an iPad - makes Logic Pro feel like a totally new DAW. It gives a huge new angle from which to approach music making with Logic, and is genuinely one of the best updates or additions to a DAW I've seen in a long time.
So, try it out!
Hopefully this guide on Live Loops inspired you to give it a go and try out a new way of approaching music production. If you've got an iPad, be sure to download the free Logic Remote app to pair this with Logic and really have some fun.
Thanks for checking in with us here at logicxx.com, and be sure to check out our deals on Logic Project Remakes, which are expertly crafted remakes of popular EDM tracks by our international team of producers. You can download these and get a detailed look under the hood of a finished, fully polished track, to see the techniques that make professional quality music tick!
Be sure to check back in with us soon!