Step Sequencing in Logic Pro
Posted by Esteban Miranda on
If you're old enough to remember playing around with hardware synths without keyboards, or if you're not old and you just happen to have some in your collection, then you're probably familiar with step sequencing as a concept.
If you use a DAW, then you're definitely familiar. It's how you program music into your DAW, just look at a piano roll, and you're looking at a basic step sequencer. But while other DAWs have had this feature in an easy and accessible way for a long time, Logic Pro has been slow to catch up.
So in this article, we are going to have a look at Logic Pro's Step Sequencer.
We'll cover:
- What Step Sequencing is, where it came from.
- An overview of how it works
- Some more detail on the specific controls and functions
- How to create and use patterns in your music
- and more!
Step Sequencing - Old School
Step Sequencing has been around since the dawn of electronic instruments, as some of the very early hardware synths available were programmable via step sequencers. It was and still is a great and intuitive way to make music without a DAW, and gives a very different feel to the music creation process than working solely in Logic or Ableton does.
As a concept, Step Sequencing is simple. Instead of inputting notes via a keyboard, as you do with some synths, you instead program them into a pre-set musical pattern of a specified length.
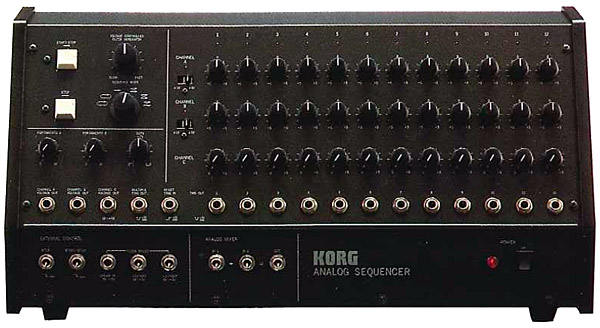
Some of the earliest options, such as the ARP Sequencer had two 8-step sequences which could run as a full 16-step pattern, or as two concurrent 8-step patterns.
I found this cool bit of info on Sweetwater.com - it might surprise you to learn that the very earliest sequencers can be dated back centuries. To be specific, some of the first documented musical sequencers showed up in the 1600s, striking bells tuned to musical notes inside of cuckoo clocks.
The player piano was another prototypical music sequencer. The Pianola, the first mass-market player piano, hit the scene at the tail end of the 19th century, and it was capable of simultaneously playing up to 65 notes from songs “sequenced” or punched onto 11.25-inch paper rolls. The term “piano roll” as it applies to the sequencing display in today’s DAWs actually derived from early player pianos.
But let's look at the DAW iteration of step sequencers, which you're no doubt very familiar with.
Step Sequencing in a DAW
If you've programmed drums in Ableton, or made tunes in FL Studio, no doubt you're used to working with a step sequencer. It appears as a grid, with the instrument or drum parts forming the horizontal rows, and the beat divisions forming the vertical columns. You draw in - or 'sequence'- the notes, and then hit play on your DAW and hear the results!

Ableton Live's drum programming uses the piano roll, but it's functioning as a step sequencer.
FL Studio's takes an aesthetic choice to mimic what older hardware sequencers looked like, but you can see from both the images that the concept underpinning each is the same.
So, hopefully now you have a good conceptual understanding of what step sequencing is and how it's used to make music. It's at this point that it's worth pointing out that though Ableton Live and FL Studio both have simple in built step sequencing capabilities, Logic Pro has always somewhat lagged behind.
It's not that you couldn't do step sequencing in Logic Pro, it's just that it was a bit more confusing and clunky. You could use the Hyper Editor (which is now, confusingly, called the Step Editor) to sort of work as a Step Sequencer, but it was not intuitive and paled in comparison to how the other DAWs on the market handle this type of music creation.
But no longer!
With Logic Pro's 10.5 update, a dedicated Step Sequencer was introduced, and it's intuitive and great to use.
So get comfortable, let's take a good look at Logic Pro's Step Sequencer!
Logic Pro - Step Sequencer
So, let's see how Logic Pro's Step Sequencer works.
Inspired by classic hardware setups, Step Sequencer has rows of configurable switches or knobs that can be used to generate repeating musical patterns. In the step grid, you create patterns by editing multi-functional steps.
So, each row contains either a sound - such as a drum kit piece, a note on an instrument, or even a range of notes - or an automation parameter. This second option allows you create automation changes over time in the pattern.
Each step represents a length of musical time. 1/4, 1/8 or 1/16 notes, for example. By default these are all of equal length, but you can change the length for individual rows or steps.
You can also adjust a wide range of parameters for individual steps, including velocity, pitch, gate time and more!
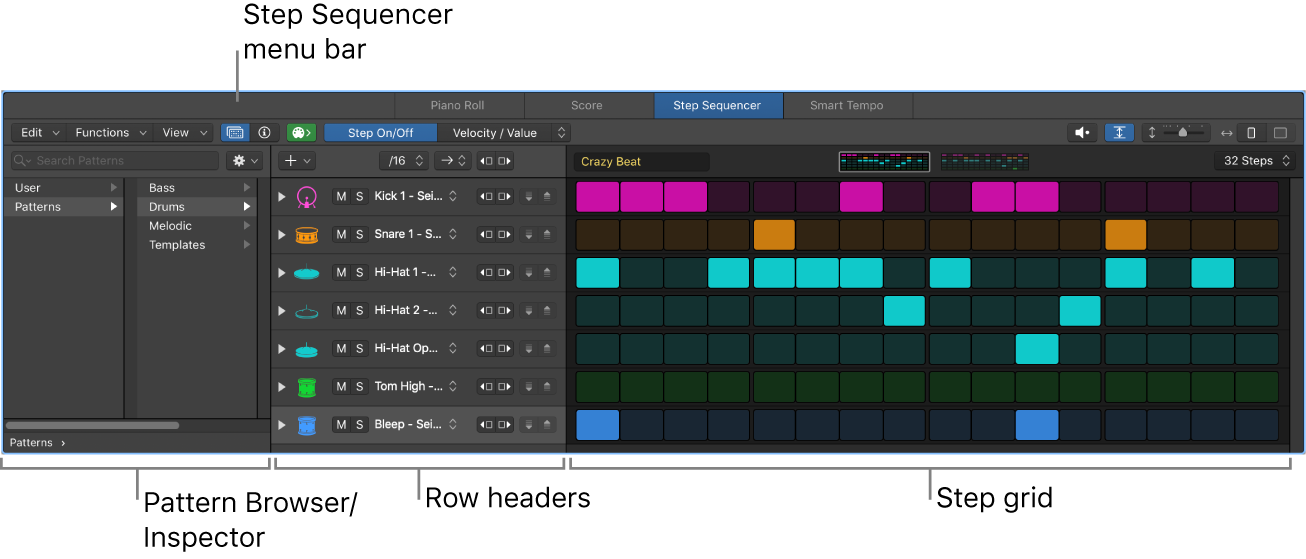
So, above is a picture of the Step Sequencer's interface. Let's break it down and cover what each area does.
-
Step grid: This is the main working area where you turn steps on and off, and graphically edit step settings using various edit modes. In the example above, you can see the coloured squares each represent the rhythms of various parts of a drum pattern.
-
Step Sequencer menu bar: Contains menus with various editing and view functions, buttons to show the Pattern Browser, Step Sequencer inspector, MIDI In / Out buttons, a Mono mode button, an Edit Mode selector, a Live Pattern Recording button, a Preview Button and Zoom controls. These are basically all of your main functions, so get familiar with what these do!
-
Pattern Browser: Access preset patterns and templates to use in your projects, and save custom patterns and templates.
-
Step Sequencer inspector: Contains tabbed sets of controls providing a central location to view and edit pattern, row, and step settings.
-
Row headers: This is where you'll find all the info for each row, or instrument part. Each header contains a row icon, a disclosure arrow to show subrows, and a set of controls for the row, including Mute and Solo buttons, a Row Assignment pop-up menu, Rotate buttons, and Increment/Decrement Value buttons.
So there's the basics of understanding the interface. They're pretty standard controls for a step sequencer, so you shouldn't feel too overwhelmed by them all!
Patterns
When you're working with Step Sequencer, you're creating patterns. Since the majority of electronic loop based music uses these in some way or another, they are a familiar concept. A Pattern is essentially a phrase of music, whether it's a drum beat or a synth line you've programmed.
These are contained either in Pattern regions (in the Tracks area) or Pattern cells (in the Live Loops grid). Both of these are used primarily on MIDI-based tracks, so this is your software instruments, your external instruments and Drummer tracks.
It's also worth noting that Pattern regions (but not Pattern cells) can be used on audio tracks to automate settings on your effects or channel strip parameters. There can be any number of pattern regions or cells, so there's no limit to how creative you can be with them!
Another cool feature is that each individual Pattern region or cell acts as its own independent iteration of Step Sequencer. This means it has its own pattern, configuration and settings. You can copy and move them just like other regions in the Tracks area.
So for each pattern you create, all of the pattern, row and step settings are stored within that pattern, so you can save patterns as templates, containing all the current settings (except for the step values) so you can use it as a starting point.
I'm aware that that's a whole lot of jargon there, but let's explore how you could use it in practice.
Maybe you get a really cool drum kit, maybe you've used Drum Kit Designer to build it. (Make sure you check out our previous article on Logic Pro's Drummer and Drum Kit Designer!) So if you want that to be your go to kit for making beats with Step Sequencer, you can save it as a preset so it's quickly accessible for you. A good function which ultimately means you spend less time in the menus and more time making music, which is always good in my book!
Before we move on to talking about the Edit modes, here's something to remember about Patterns, taken from the Logic Pro Manual.
Patterns can include two types of rows:
Note rows: Generate MIDI note events (for each active step). By default, all notes in a note row have the same pitch, but you can change the pitch for individual steps using the Note and Octave edit modes.
Automation rows: Generate stepped automation events for an automatable parameter. You can assign an automation row to any automatable parameter, including MIDI continuous controller (CC) parameters, channel strip controls, plugin parameters, and Smart Controls.
Edit Modes
Edit modes are how you can control different attributes of the note or automation event which is triggered by a step. Some of these modes apply only to one row type, while others are common to both.
For note rows, you can change the velocity, pitch, gate time, number of note repetitions in a step, and other parameters.
For automation rows, you can change the value of the automated parameter.
Edit modes common to both row types include skipping and tying steps, changing the point that the loop starts and ends, and changing the step rate.
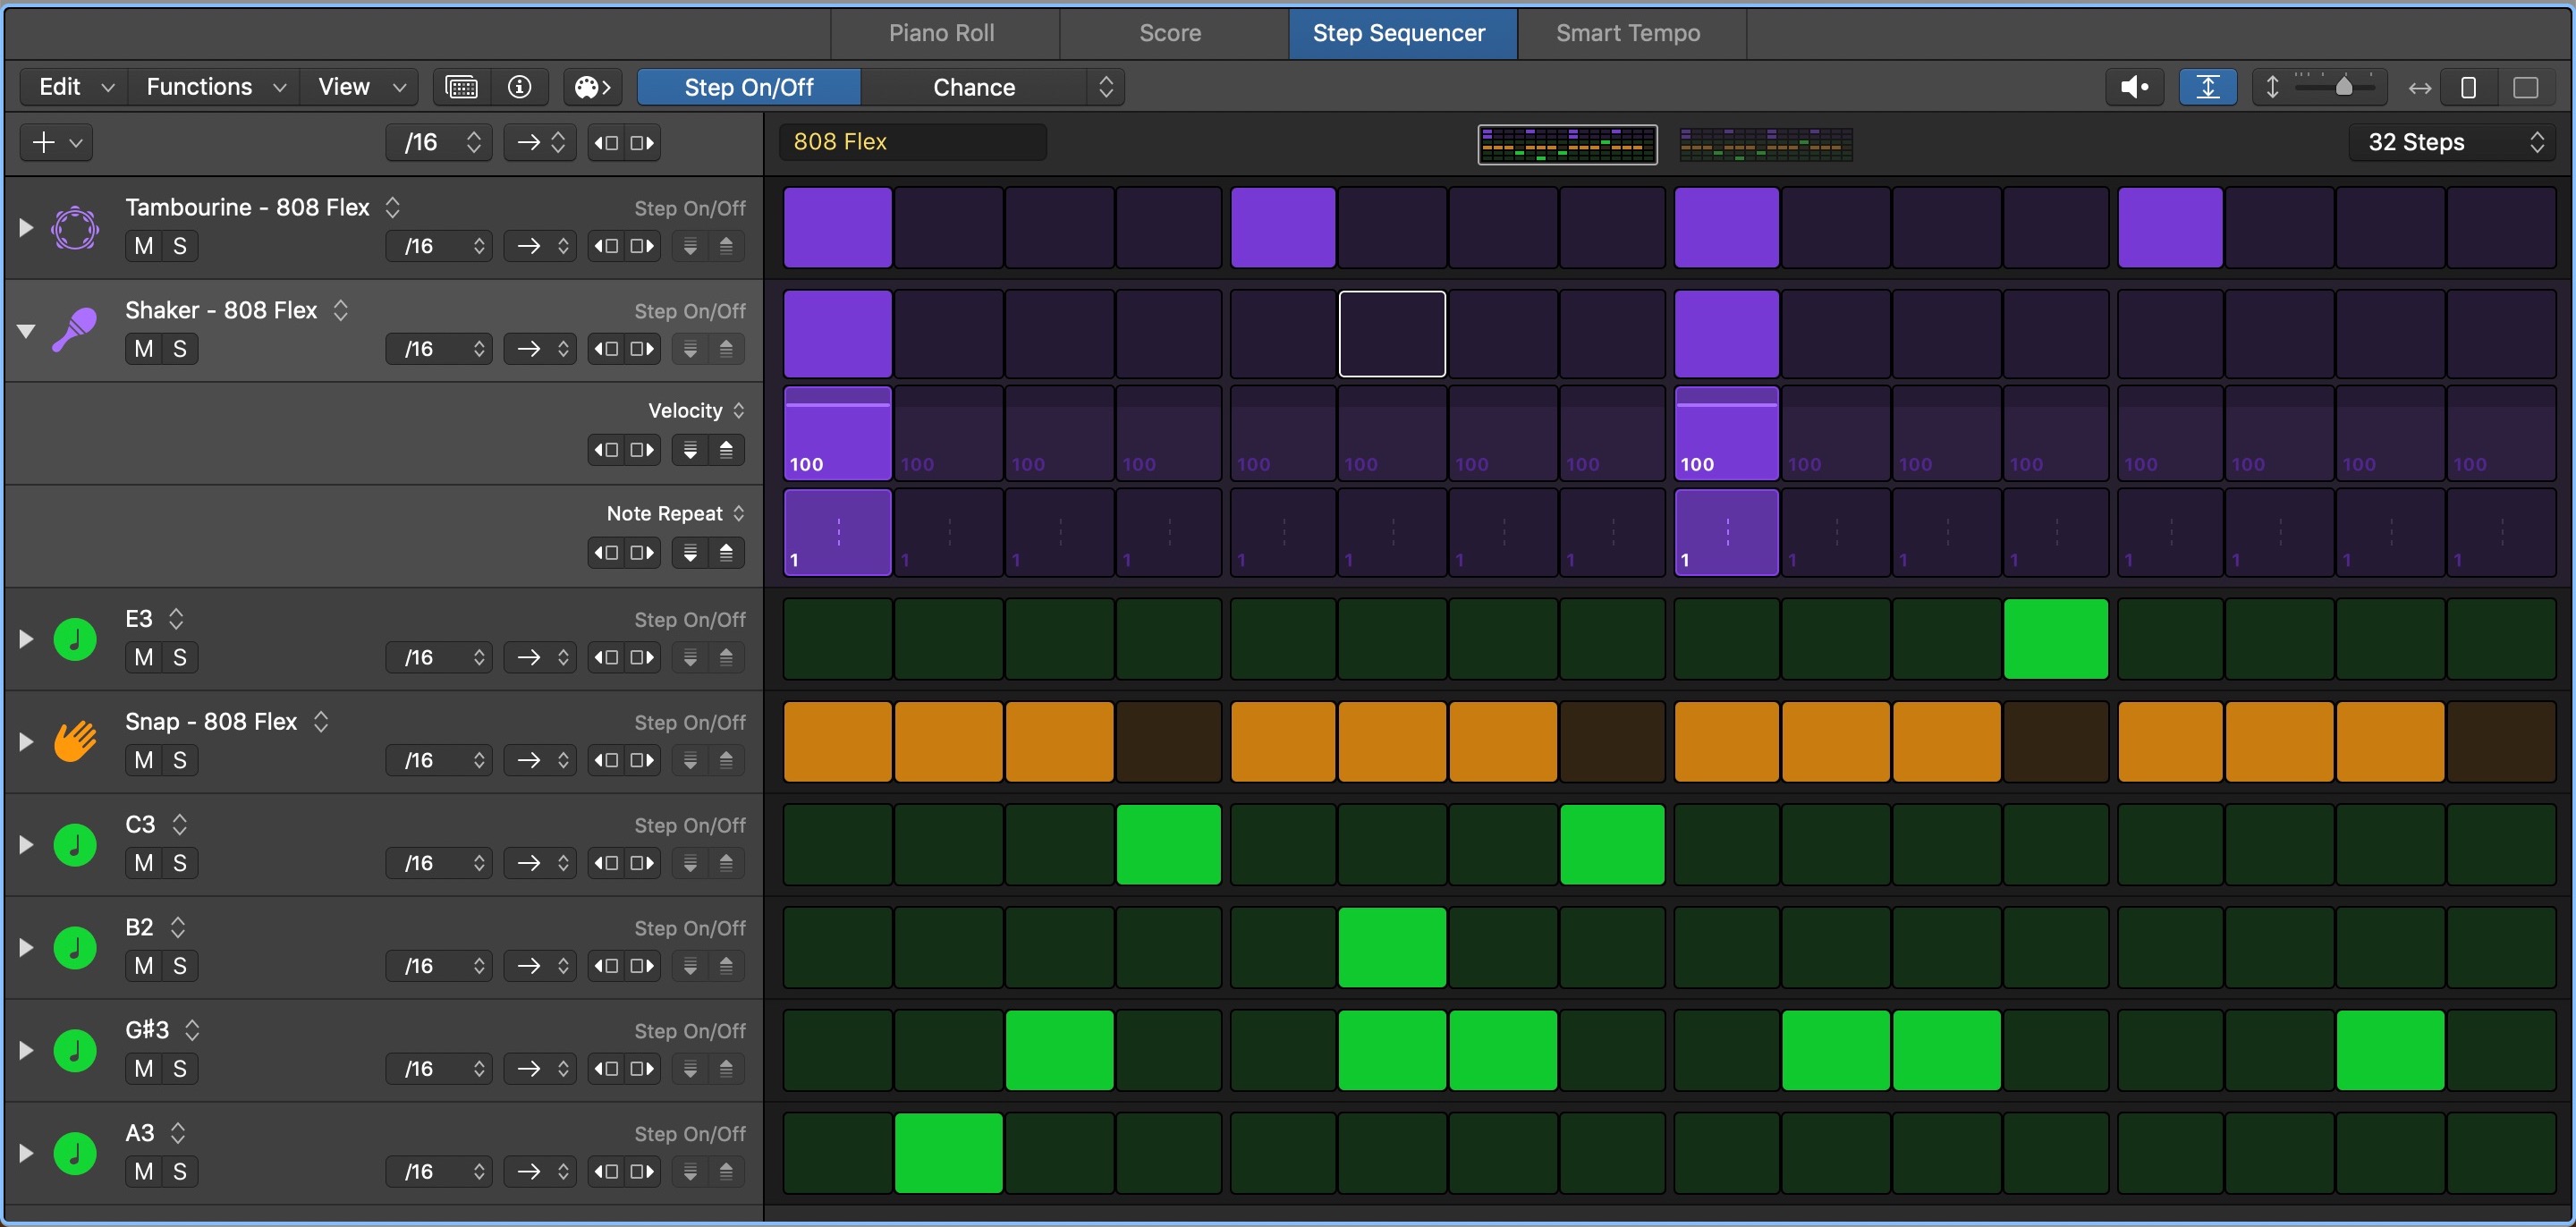
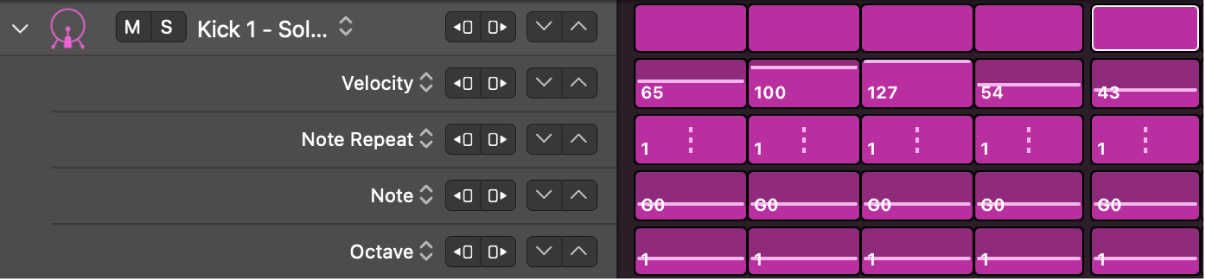
You can select the edit mode for all rows in the pattern using the Edit Mode selector in the Step Sequencer menu bar. You can also edit multiple modes per row using subrows. You can see this below.
This means that there's a whole lot of control you can exercise over the individual notes and elements of your pattern. Using automation within the pattern to change a parameter over the run time is just one example of this, but as mentioned above, you can create dynamic and versatile changes to your music using the myriad other controls!
So, now that we've covered these, let's look at how you can get creating some patterns!
Using Step Sequencer to create Patterns
You can use Step Sequencer to create either rhythm-based drum patterns, or note-based instrument patterns using any available software instrument. If you're feeling confident, you can start with an empty pattern, but there are also existing patterns or templates you can load up to get your head around how things work.
You create a pattern by turning steps on and off, modifying the sound and duration of the steps using the edit modes, and editing aspects of the overall pattern. This includes length, the step rate for the pattern, and the key the pattern is in.
You can create Step Sequencer Patterns in either the Tracks area or the Live Loops grid.
For the Tracks area:
-
Control-click in an empty software instrument track, then choose Create Pattern Region from the shortcut menu.
-
Select an empty software instrument region, click the Step Sequencer tab in the Editors area, then click a step in the step grid.
And for the Live Loops grid:
-
Select an empty software instrument cell, click the Step Sequencer tab in the Editors area, then click a step in the step grid.
-
Control-click an empty software instrument cell in the Live Loops grid, then choose Create Pattern Cell from the shortcut menu.
We've covered the various edit modes and controls, and while it can seem overwhelming, remember that there are preset patterns that you can load up and dig into the see how things are made in a complex way. But make sure to just dive right in and see what does what!
Using Step Sequencer with Drum Machine Designer
So, hopefully you read our previous posts on working with drums in Logic Pro, in particular, the sections about Drum Machine Designer, which is Logic's great 'track based meta-instrument' which allows you to create and design your own Drum Machine patches.
While it would take pages and pages and hours and hours to discuss how to use Step Sequencer with every single MIDI instrument Logic Pro can offer, it's worth taking the time to point out how well it integrates with Drum Machine Designer.
It is especially suited to creating drum patterns, it's almost as if they designed it that way!
When you load up a new pattern region on a track with Drum Machine Designer loaded onto it, it will automatically assign the note rows to correspond with the kit pieces in the Drum Machine Designer patch. So straight away, the kit pieces and name labels are all automatically in place for you.
You can also separate a pattern region into multiple pattern regions, so that each individual piece of your kit is running its own one-row region. This can be useful if you want to work with different rows and separate individual regions.
To do this, select the pattern region you're working with.

So in the image above you can see the region contains all the drum parts, and beneath it are the track subrows which the labels for each individual element of the kit.
In order to separate them, do one of the following;
-
Choose Edit > Convert > Separate by Kit Piece in the control bar.
-
Choose Edit > Convert > Separate by Kit Piece in the Tracks Area menu bar.
-
Control-click the region, then choose Convert > Separate Pattern Region by Kit Piece from the shortcut menu.
Once you've done this, click the disclosure arrow (the little arrow next to the track icon) to view the Track Stack.
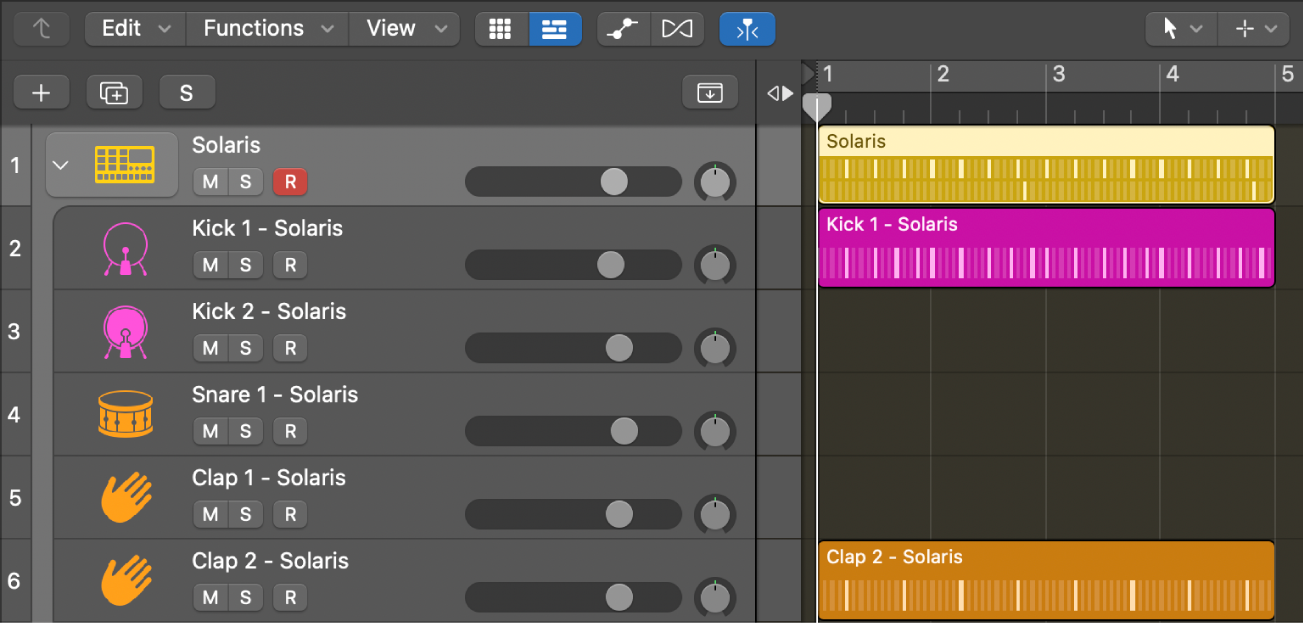
Now you can see in the image above, that the pattern has been separated into its constituent parts, with each one having its own dedicated region in the Track Stack.
Conclusion
So, it may have been a long time coming, but Logic Pro's Step Sequencer really makes the workflow so much easier when it comes to creating music in this way. If you're creating mainly loop based electronic music, then a step sequencer is a valuable tool in your arsenal. (Though it isn't just limited to that genre!)
With its signature Logic Pro interface, and easy to grasp functions, Step Sequencer is a great tool.
Hopefully this guide gave you the info you needed to try it out more confidently, or made you aware of a few functions or features that were previously unknown to you.
Either way, thanks for checking in with us! While you're here, make sure to check out our deals on project templates, because just like those Step Sequencer preset patterns, they're a great way to learn complex production techniques in an easy to understand way!